🚀 Welcome to our new blog, Mastering Microservices: Setting API Gateway with Spring Cloud Gateway! 🌐 In this insightful journey, we'll guide you through the process of setting up an API Gateway using Spring Cloud Gateway. 🛠️ Get ready to delve into the world of Microservices and unlock the power of seamless communication. Let's embark on this learning adventure together! 🚀💡
What is API Gateway in Spring Cloud Gateway and why is it used?
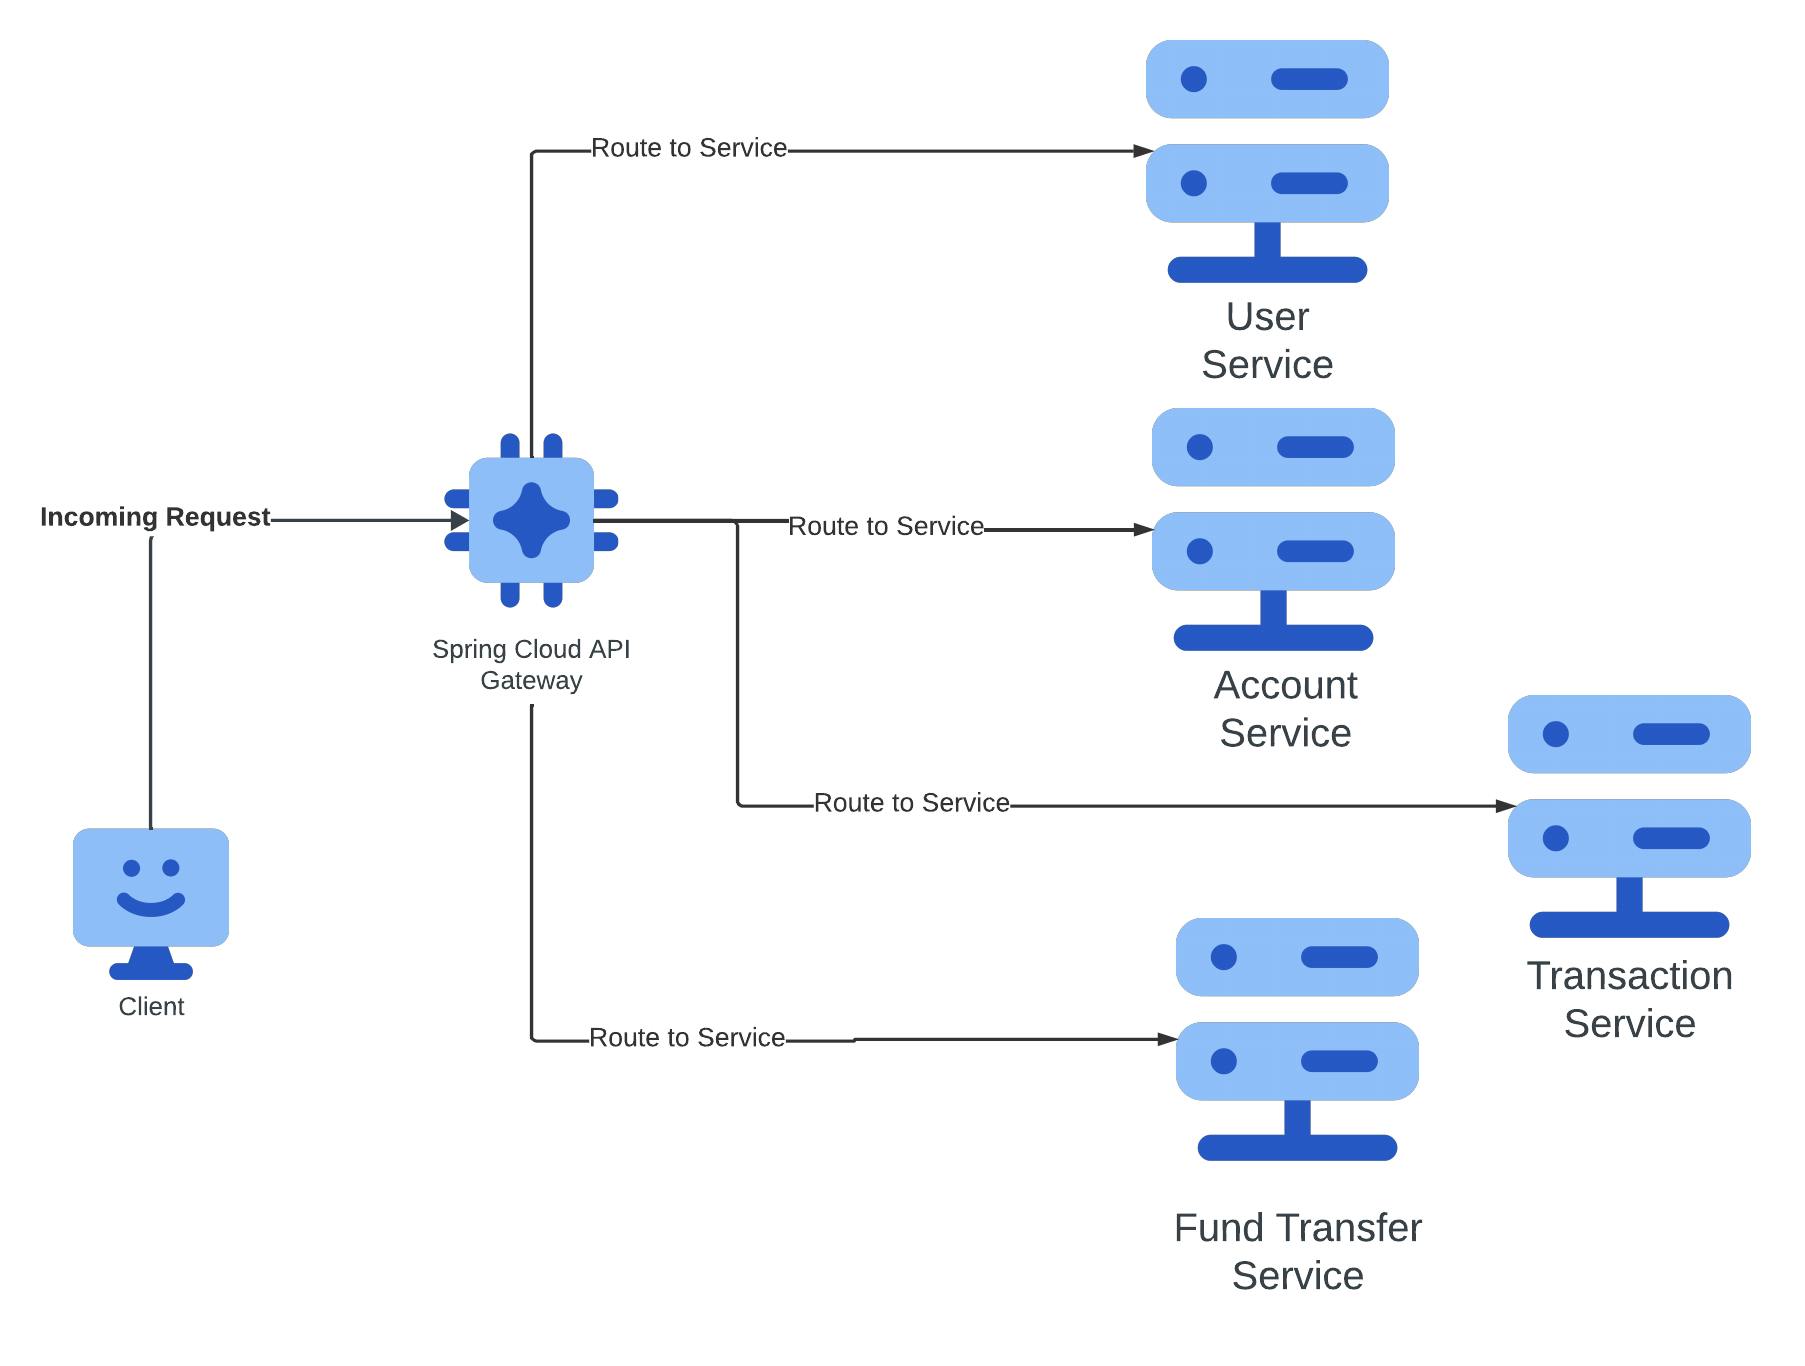
An API Gateway in Microservices acts as a central hub, streamlining communication between clients and microservices. It unifies APIs, and handles routing, load balancing, and security, simplifying client access. With features like caching and error handling, it optimizes performance and ensures a seamless user experience. In essence, the API Gateway is a key orchestrator, enhancing efficiency in Microservices architecture. 🌐🚀
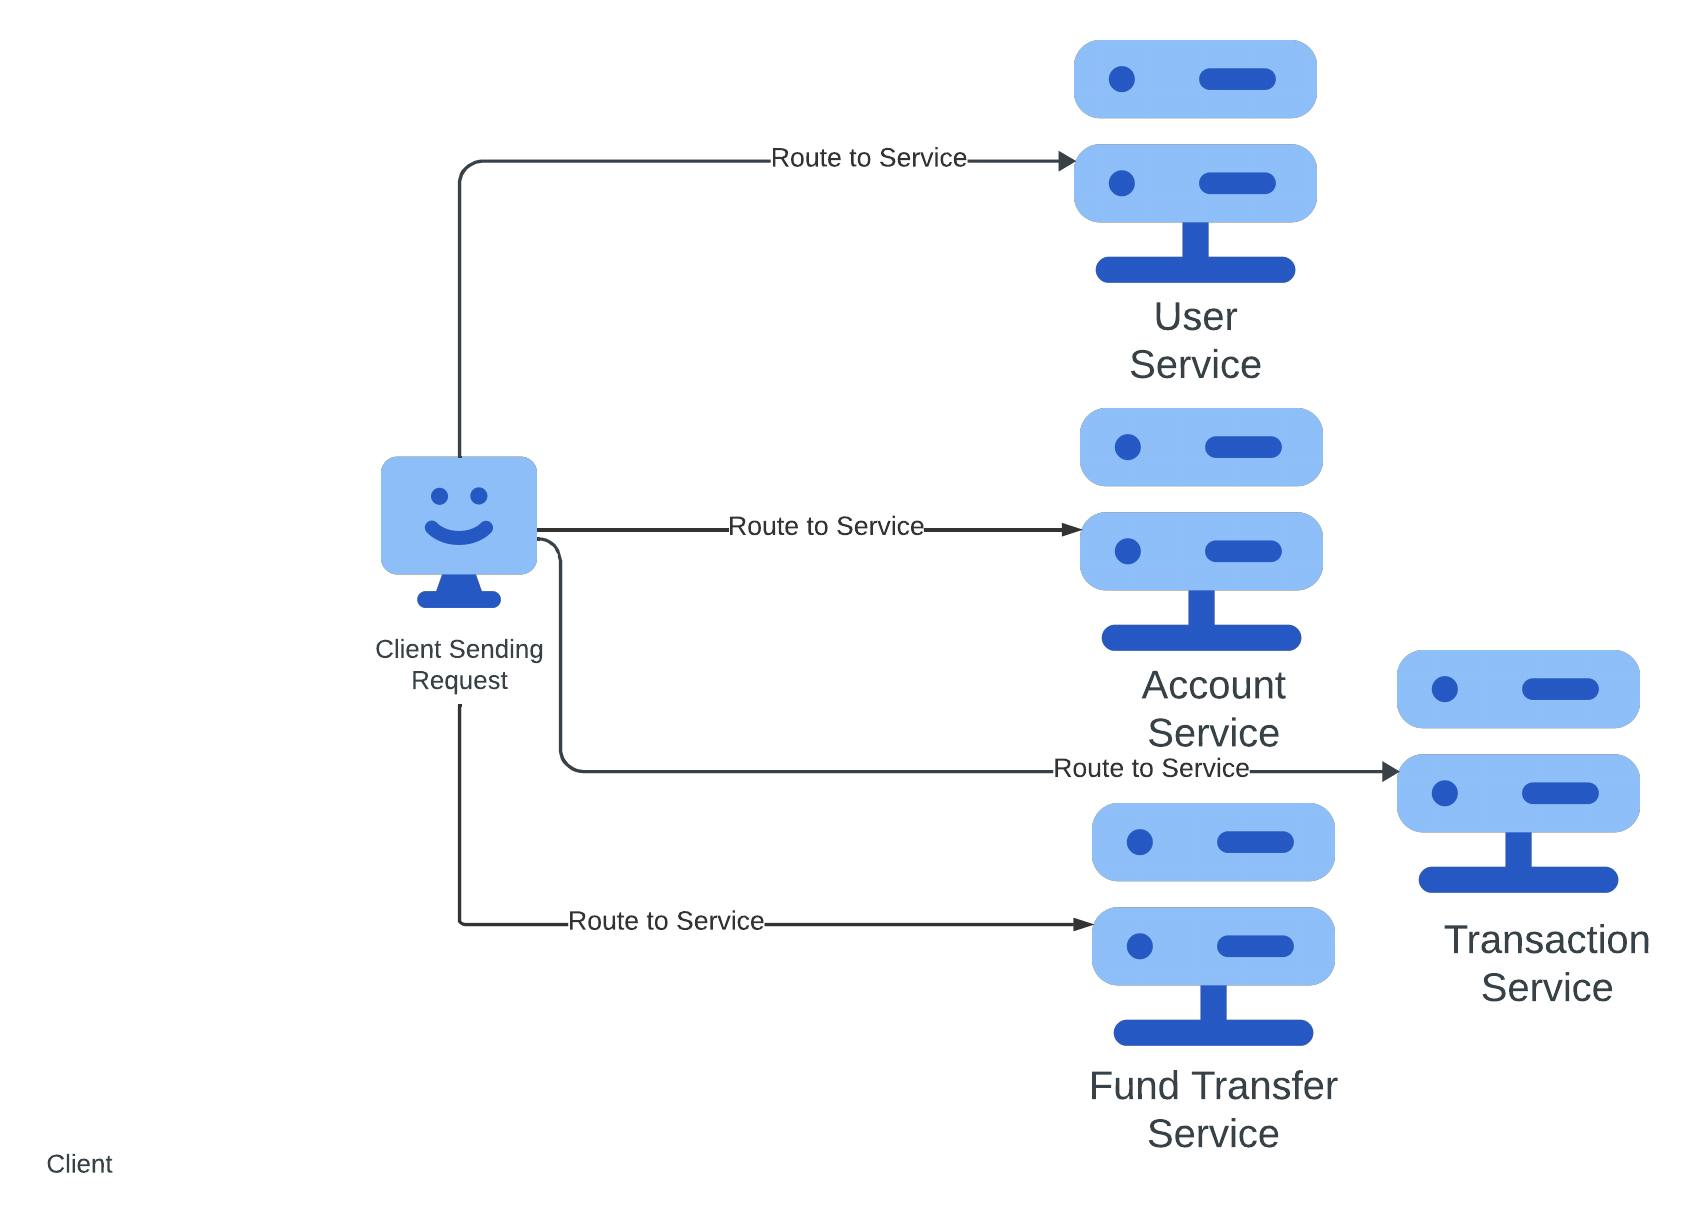
There are mainly two ways through which the APIs can be called:
1. Direct Client-Microservice Communication:
Advantages: Simplicity, flexibility, and decentralization.
Challenges: Complex client logic, increased latency, and security concerns due to decentralized authentication.

2. API Gateway Microservice Communication:
Advantages: Centralized management, simplified client communication, and consistent security.
Challenges: Single point of failure, additional complexity, and potential bottleneck in high-traffic scenarios.

Some of the problems that the API Gateway solves:
Unified Communication:
Problem: Clients dealing with multiple microservices face complexity in decentralized communication.
Solution: The API Gateway simplifies this by providing a unified entry point, streamlining client requests and consolidating responses from diverse microservices.
Centralized Management and Optimization:
Problem: Managing independently deployable microservices is challenging.
Solution: The API Gateway centralizes functions like routing, load balancing, and security, simplifying overall system management and optimization.
Standardized Integration:
Problem: Microservices using different protocols and data formats pose integration challenges.
Solution: The API Gateway handles protocol translation, ensuring consistent data formats for seamless communication.
Security and Access Control:
Problem: Ensuring consistent authentication and authorization across microservices is complex.
Solution: The API Gateway centrally manages authentication and authorization, providing robust security controls.
Setting up API Gateway for the project:
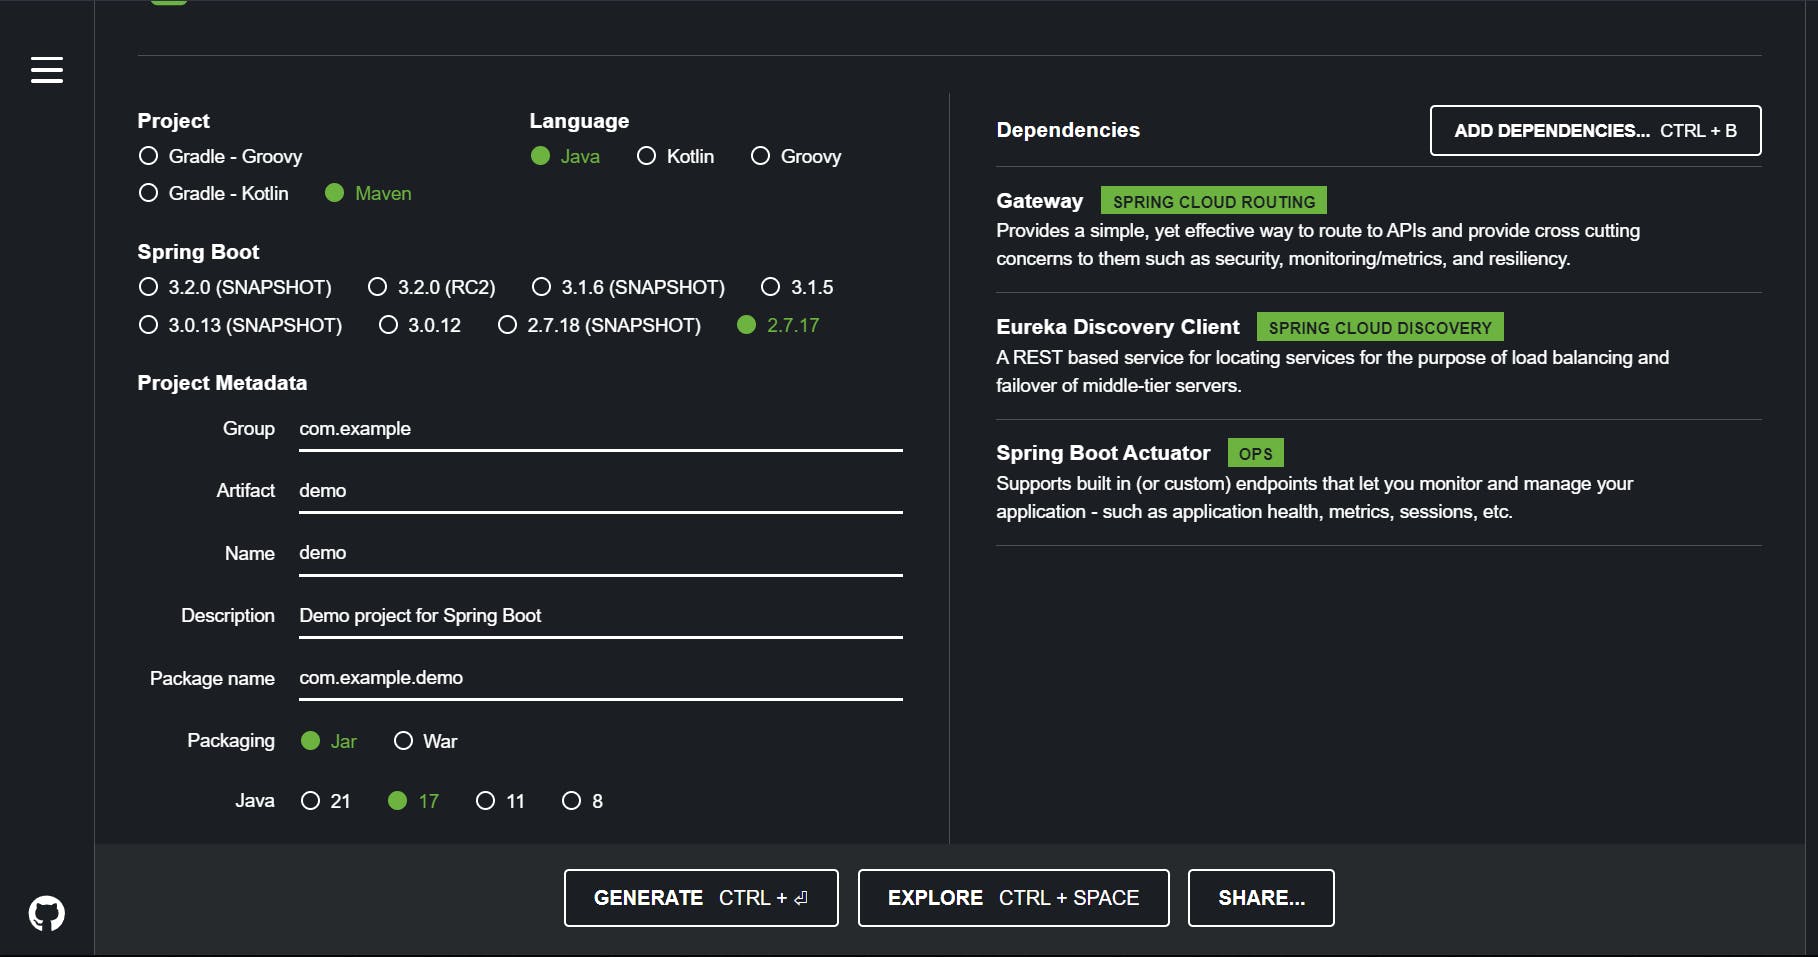
Now move to your favorite IDE or Spring Initializer and create a Spring boot project with the following dependencies:

Now that we have created a project that will be going to act as an API Gateway for our microservices, we need to add an annotation to the project so that the gateway is registered at the service registry that we created in our previous article.
What is @EnableEurekaClient?
@EnableEurekaClient is an annotation in Spring Cloud that is used to enable a Spring Boot application to act as an Eureka client. Eureka is a service registry and discovery server that allows microservices to register themselves and discover other services in a distributed system. When you use @EnableEurekaClient in your Spring Boot application signifies that the application should register itself with an Eureka server.
package org.training.api.gateway;

import org.springframework.boot.SpringApplication;
import org.springframework.boot.autoconfigure.SpringBootApplication;
import org.springframework.cloud.netflix.eureka.EnableEurekaClient;

@SpringBootApplication
@EnableEurekaClient
public class ApiGatewayApplication {

    public static void main(String[] args) {
        SpringApplication.run(ApiGatewayApplication.class, args);
    }

}
Now we are gonna add configuration so that the application detects where the service registry is present:
server:
  port: 8080

eureka:
  client:
    service-url:
      defaultZone: http://localhost:8761/eureka

spring:
  application:
    name: api-gateway
Now that we have set up the basics API Gateway run the application from IDE or execute the following command from the parent directory of the API Gateway application. Also, keep in that the Service Registry application should be up and running so that the API Gateway can register itself.
mvn clean install
mvn spring-boot:run
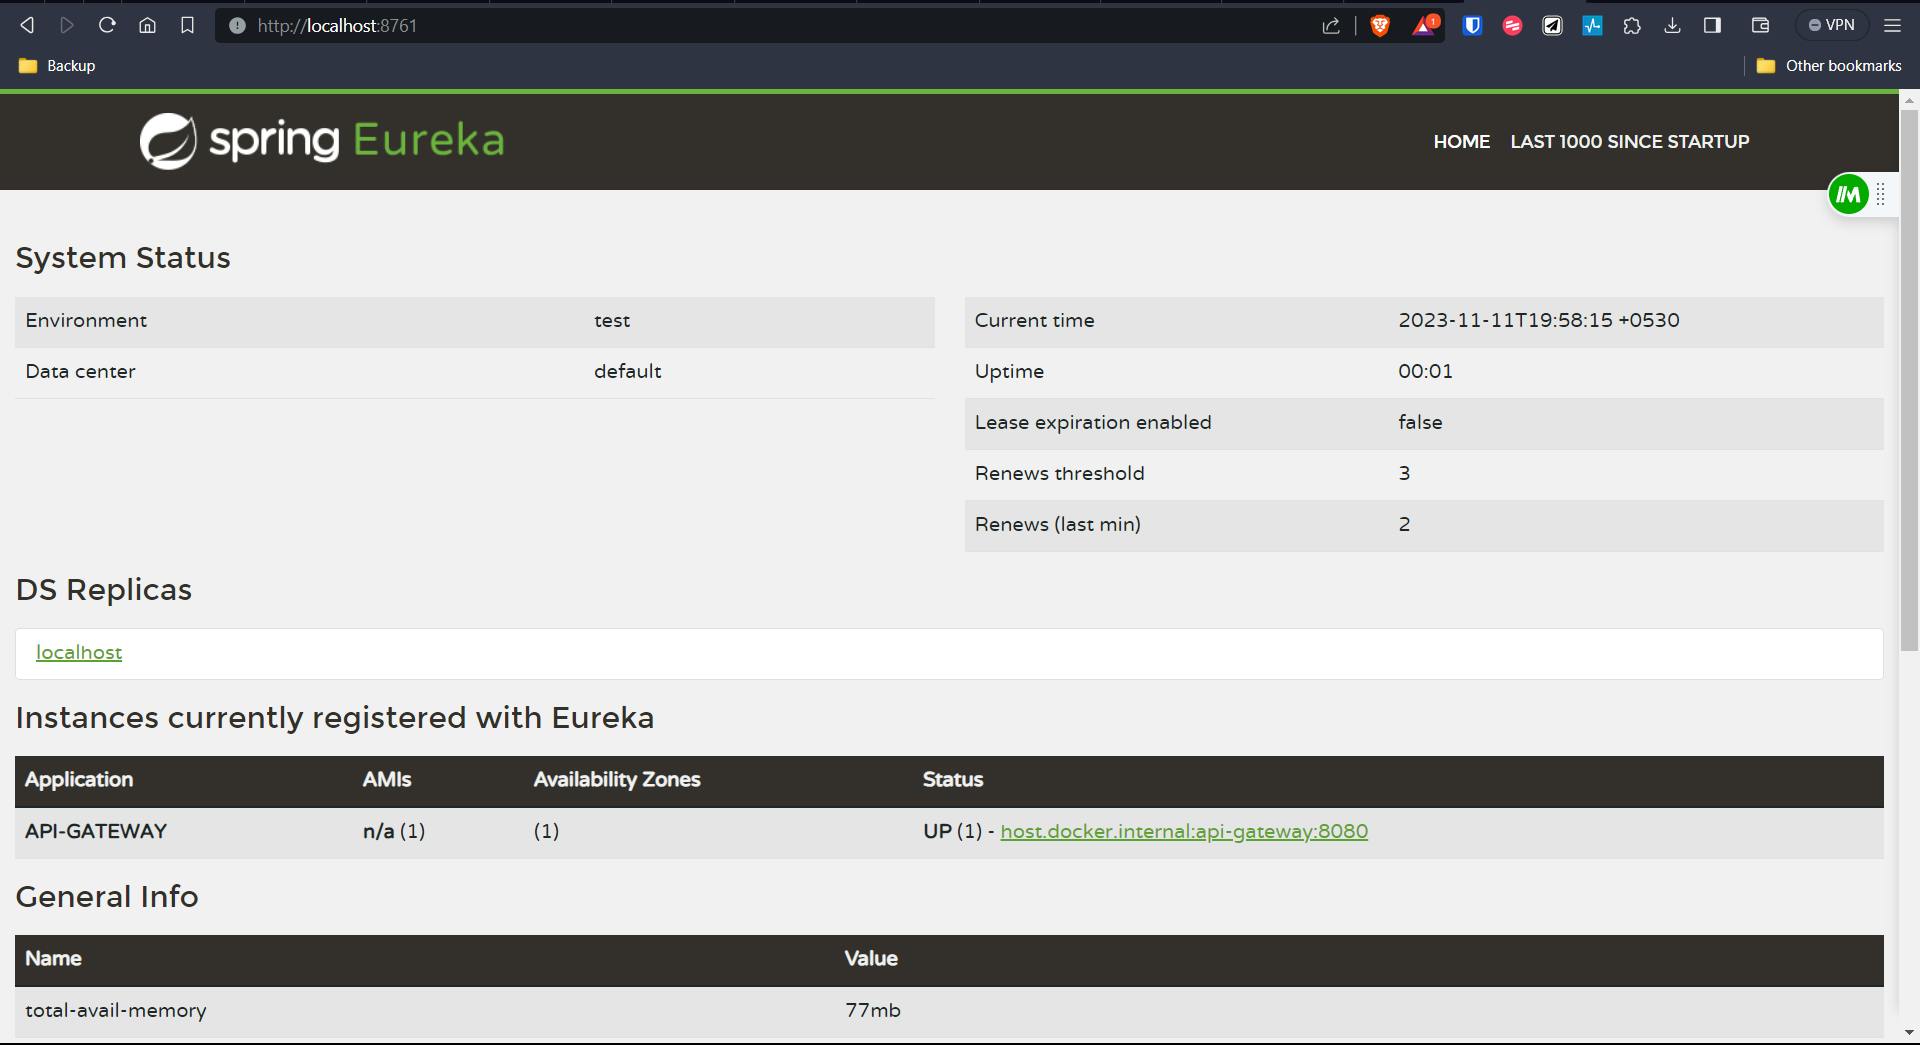
Now navigate to the Eureka Service Registry localhost:8761 you be able to see that the API Gateway is registered successfully.

We see here that the API Gateway successfully registered itself with the service registry.
Configuring the API Gateway routes with Spring Cloud Gateway
Now we will configure the User Service application so that we will able to route the requests through the API Gateway. So now instead of directly sending the request from the client to the service, the request will be sent to the API Gateway and then the API Gateway will identify the service to which the request has to be sent, and then the request is sent to that service.
Add the following configuration in the application.yml file:
server:
  port: 8080

eureka:
  client:
    service-url:
      defaultZone: http://localhost:8761/eureka

spring:
  application:
    name: api-gateway

  cloud:
    gateway:
      routes:
        - id: user-service
          uri: lb://user-service
          predicates:
            - Path=/api/users/**
here I'm adding the user-service access, which we are going to add in future articles.
Some of the properties in the configuration are new, so what are they?
id(Route Identifier):- The
idattribute assigns a unique identifier ("user-service") to the route, serving as a reference within the Spring Cloud Gateway configuration for managing and identifying this specific route.
- The
uri(Destination URI):- The
uriattribute specifies the destination URI (lb://user-service), indicating that incoming requests matching the route conditions will be forwarded to the "user-service" after load balancing. Thelb://prefix denotes load balancing.
- The
predicates(Route Predicates):- The
predicatesattribute defines conditions for route execution. In this case, the path-based predicate- Path=/api/users/**ensures that requests with paths starting with/api/users/will trigger this route, directing them to the specified destination URI.
- The
Conclusion
Thanks for reading our latest article on Mastering Microservices: Setting API Gateway with Spring Cloud Gateway with practical usage.
You can get the source code for this tutorial from our GitHub repository.
Happy Coding!!!!😊

