🔐 Welcome to our new article, Mastering Microservices: Authentication and Authorization with Keycloak 🌐 We'll walk you through the basics of setting up secure logins and controlling who can do what in your application using Keycloak. 🛡️Get ready to add an extra layer of protection to your applications. Let's dive into this security journey together! 🔐
What is Keycloak?
Keycloak is an open-source Identity and Access Management (IAM) tool 🛡️. Developed by Red Hat, it simplifies user authentication and authorization processes for applications, offering features like single sign-on (SSO) and social logins 🚀. Keycloak supports standards like OAuth 2.0 and OpenID Connect, making it versatile for securing web applications 🔐. Its user-friendly interface and powerful capabilities help manage user access and permissions effectively. 🌐
Setting up Authentication and Authorization
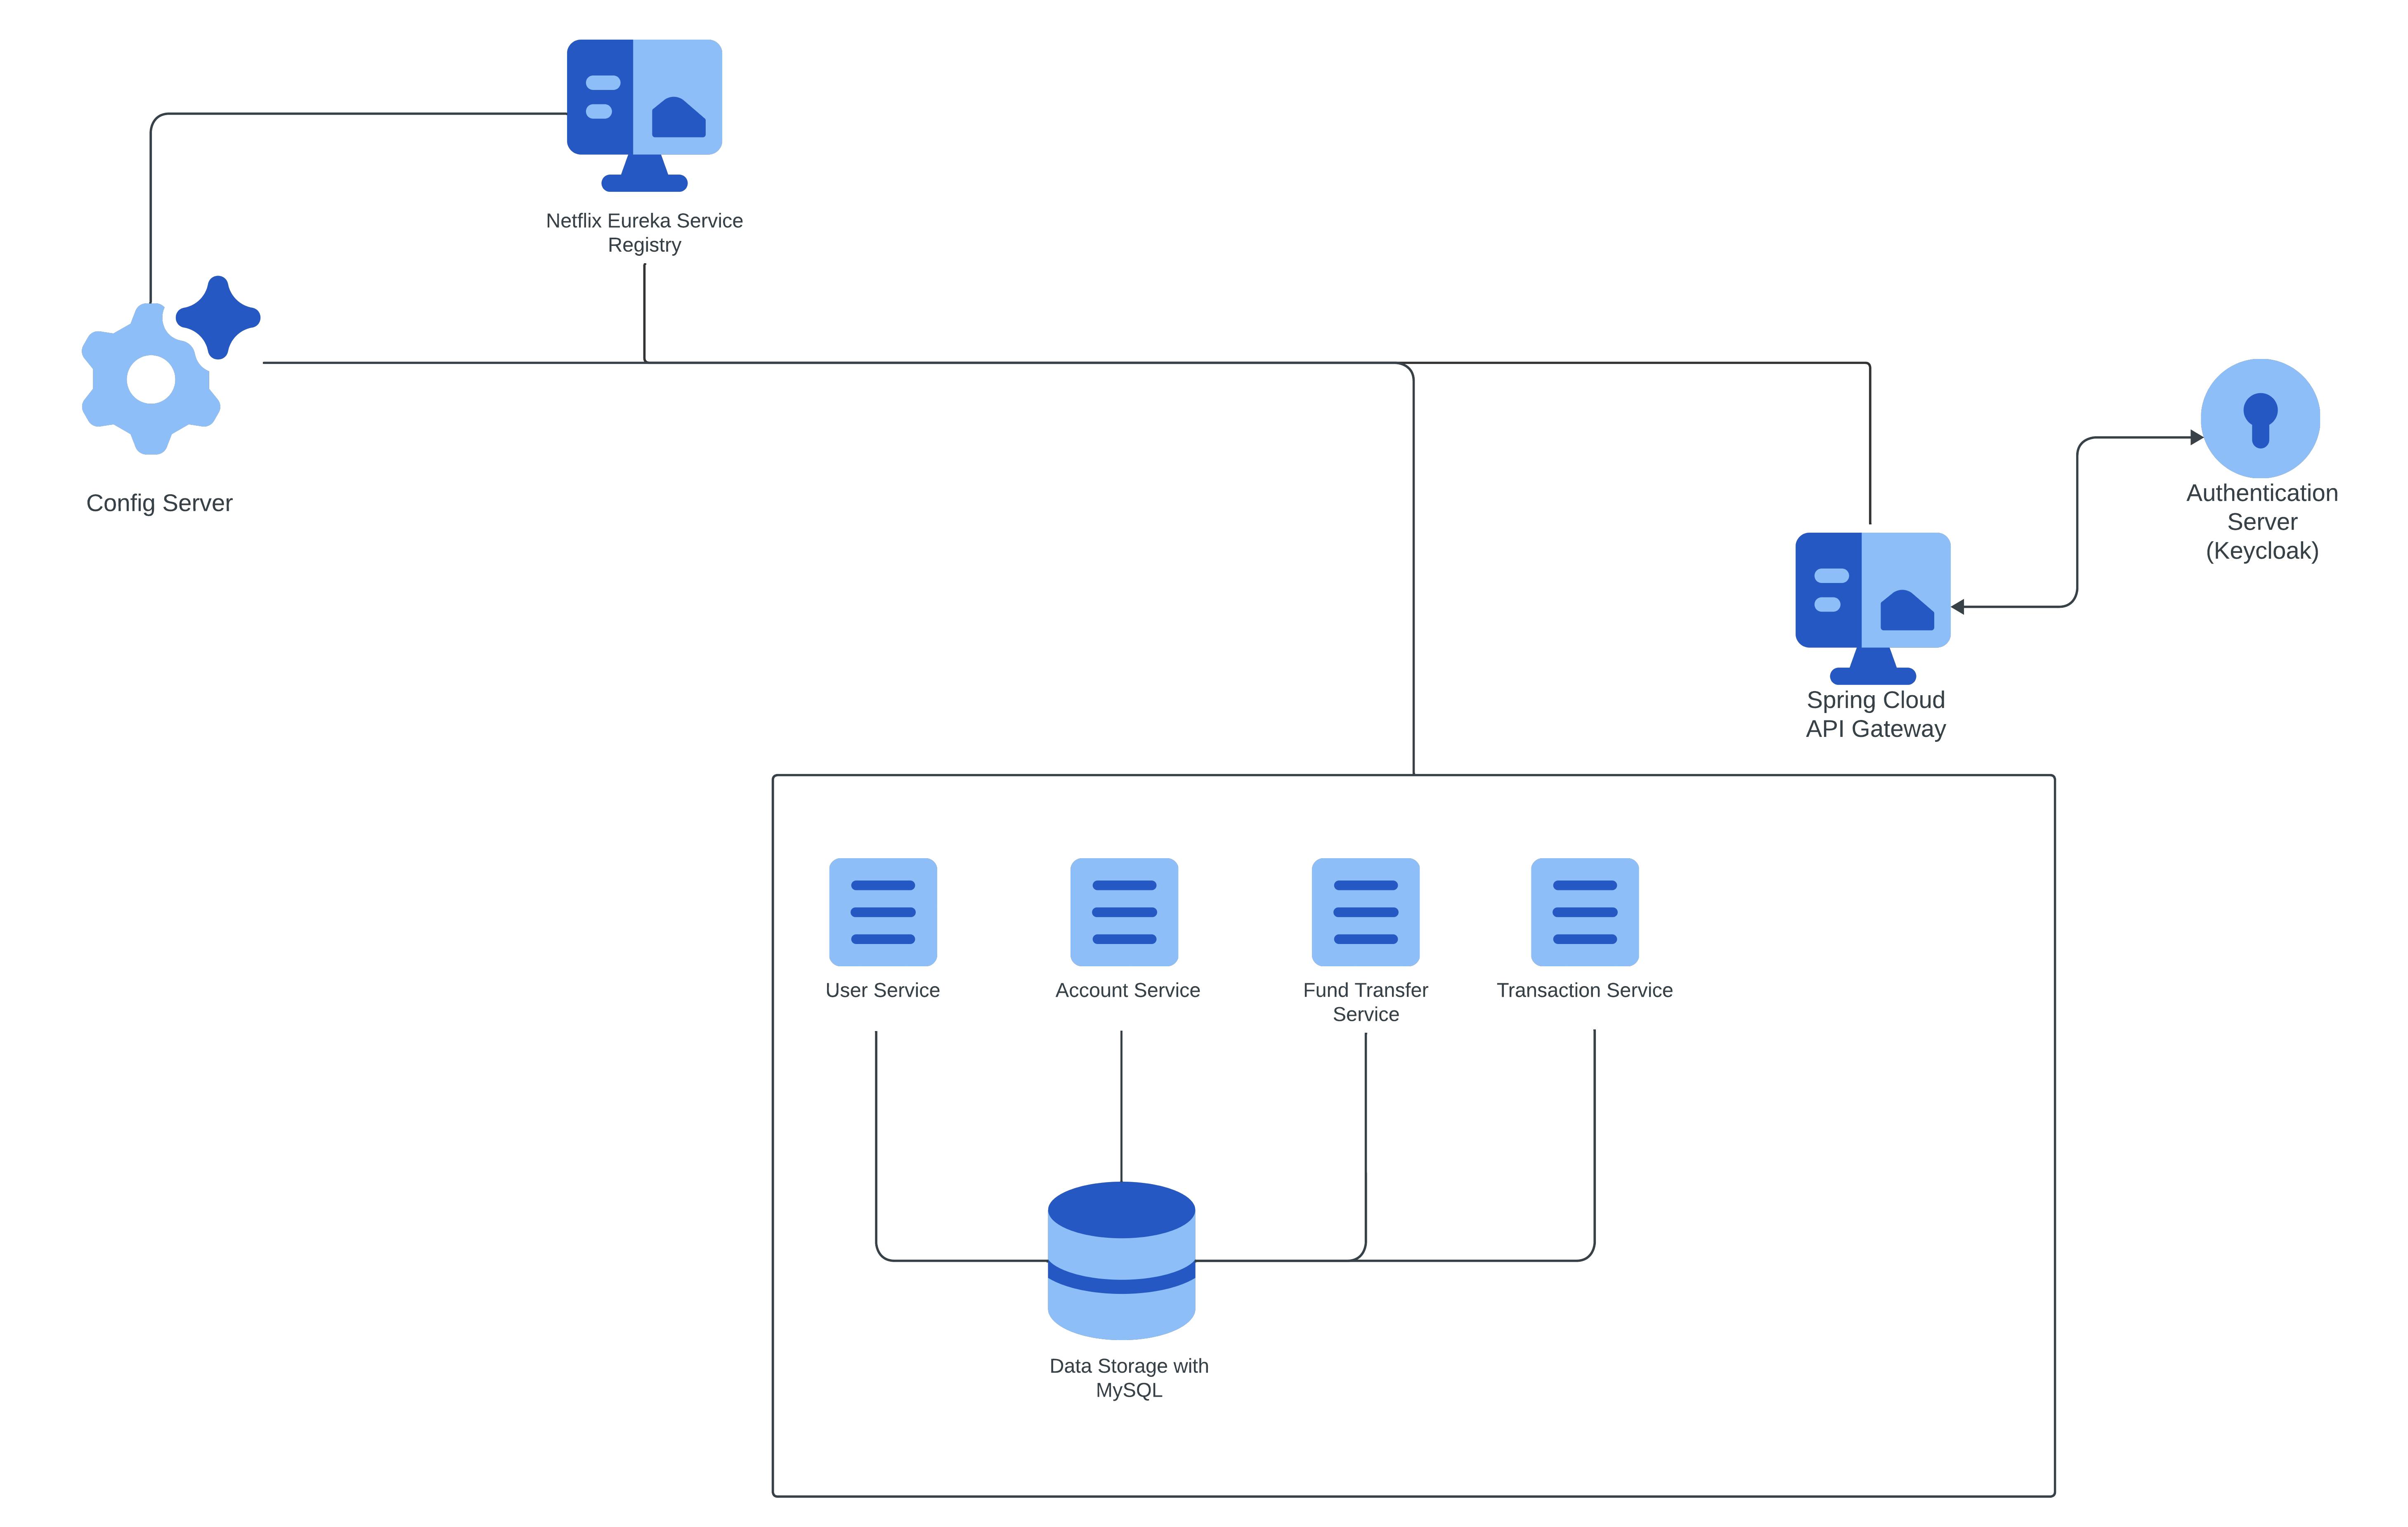
In this setup, we're focusing on implementing the authentication and authorization layer exclusively within the API gateway. All other services will rely on infrastructure-level authentication to prevent direct access. Essentially, the API gateway becomes the sole entry point accessible to the public, ensuring a centralized and controlled access point for all requests.
Moreover, if there's a requirement for authentication across all services, it's entirely feasible. Keycloak, in particular, supports single sign-on (SSO), providing a straightforward configuration with Spring Boot. This flexibility allows for a seamless and secure authentication experience across the entire service ecosystem. 🌐🛡️
Configuring the Keycloak
The keycloack server can be started via two ways:
Starting Keycloak via Standalone Server:
Download the standalone server from the keycloak website and extract it.
Navigate to Keycloak Bin Directory:
- Open a terminal or command prompt and go to the directory inside your Keycloak installation.
Execute Standalone Script:
Run the standalone script for your operating system, which by default starts in port 8080 (e.g.,
kc.batfor Windows orkc.shfor Unix-based systems).we can specify a different port
--http-port=8571For Windows OS:
bin\kc.bat start-dev --http-port=8571For Linux OS:
bin/kc.sh start-dev --http-port=8571
Wait for Server to Start:
- Keycloak will start, and you'll see logs indicating the server's initialization progress.
Access Keycloak Admin Console:
- Once started, you can access the Keycloak Admin Console at
http://localhost:88571.
- Once started, you can access the Keycloak Admin Console at
Starting Keycloak via Docker:
Make sure you have the docker installed in your system, if not download via Docker website.
Now visit the keycloak website to get the latest the version command else copy from below:
- We can change the port by changing port number at
-p 8080:8080to-p 8571:8080
- We can change the port by changing port number at
docker run -p 8080:8080 -e KEYCLOAK_ADMIN=admin -e KEYCLOAK_ADMIN_PASSWORD=admin quay.io/keycloak/keycloak:23.0.3 start-dev
Wait for Server to Start:
- Keycloak will start, and you'll see logs indicating the server's initialization progress.
Access Keycloak Admin Console:
- Once started, you can access the Keycloak Admin Console at
http://localhost:8571.
- Once started, you can access the Keycloak Admin Console at
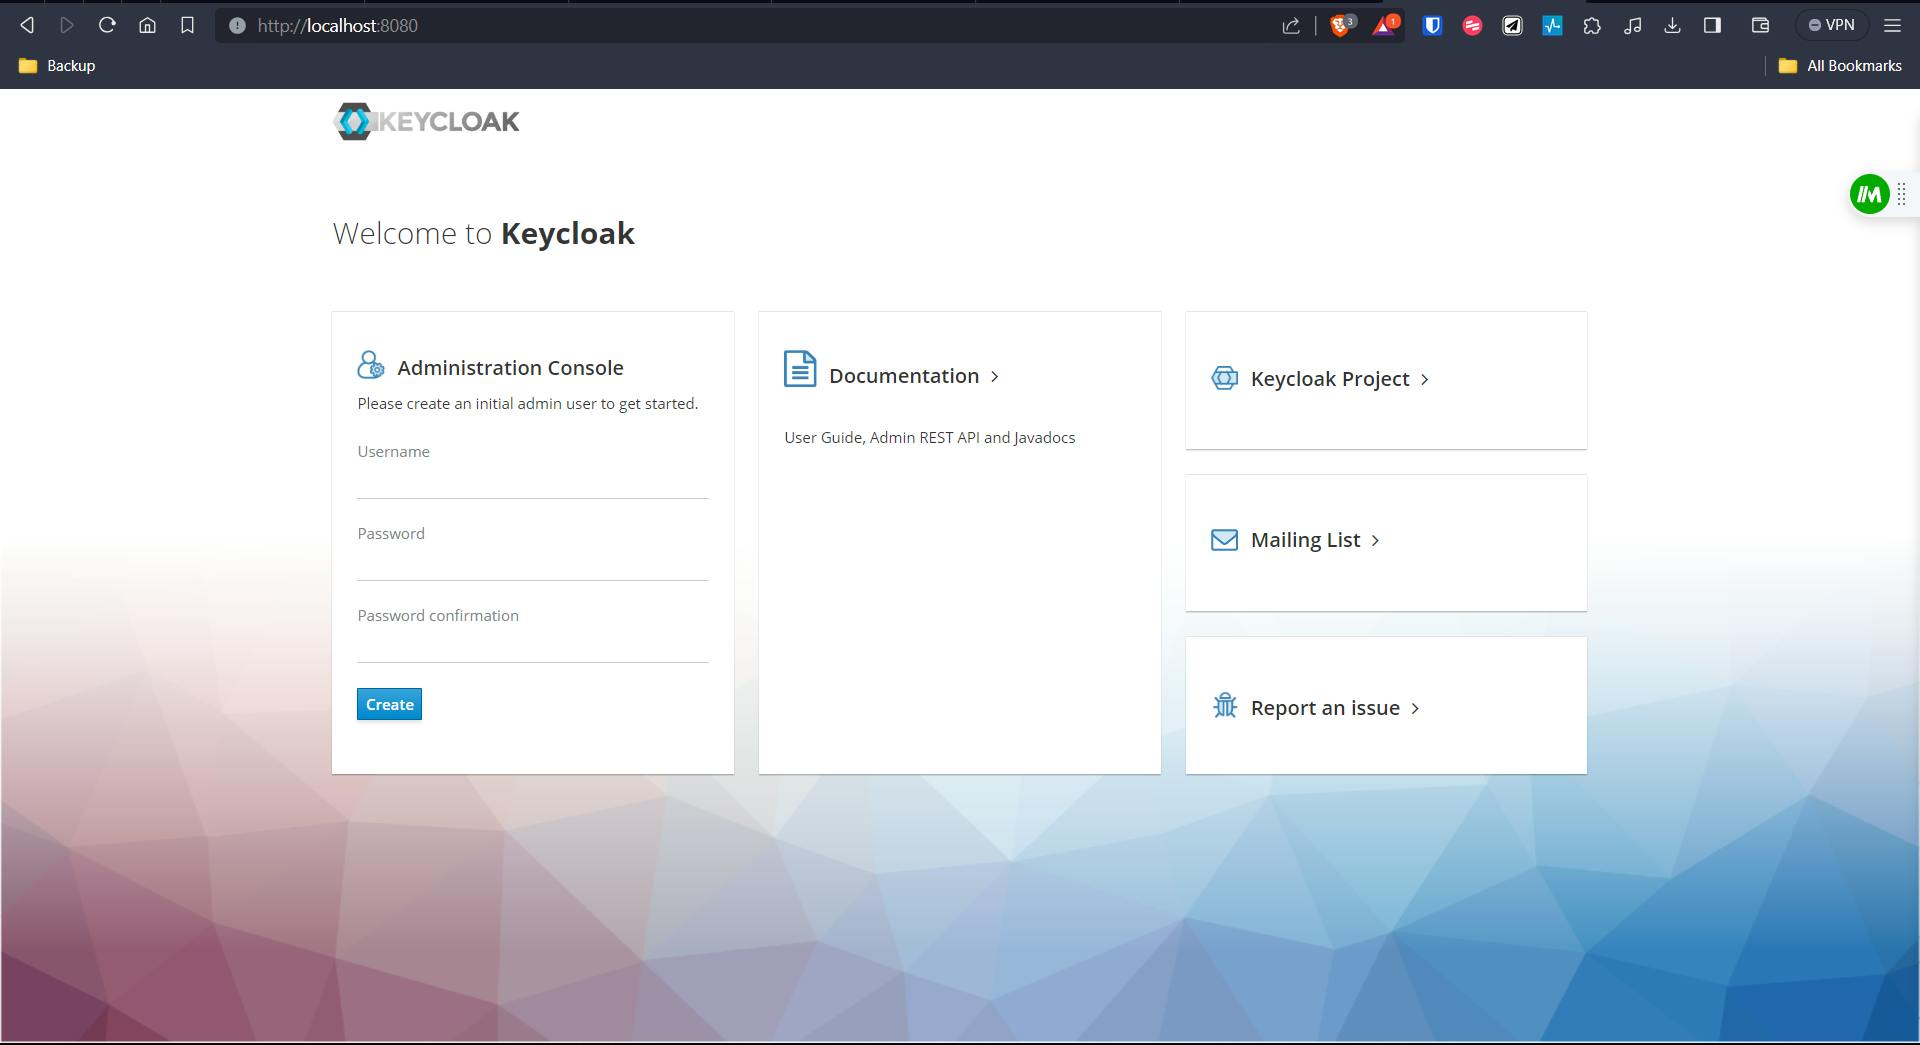
After starting the Keycloak server, the initial step is to log in or create user credentials. This is crucial for accessing the Keycloak Admin Console and managing your identity realm. If you're using Docker, it's essential to provide the same credentials during the container startup that you intend to use for logging into the Keycloak Admin Console.
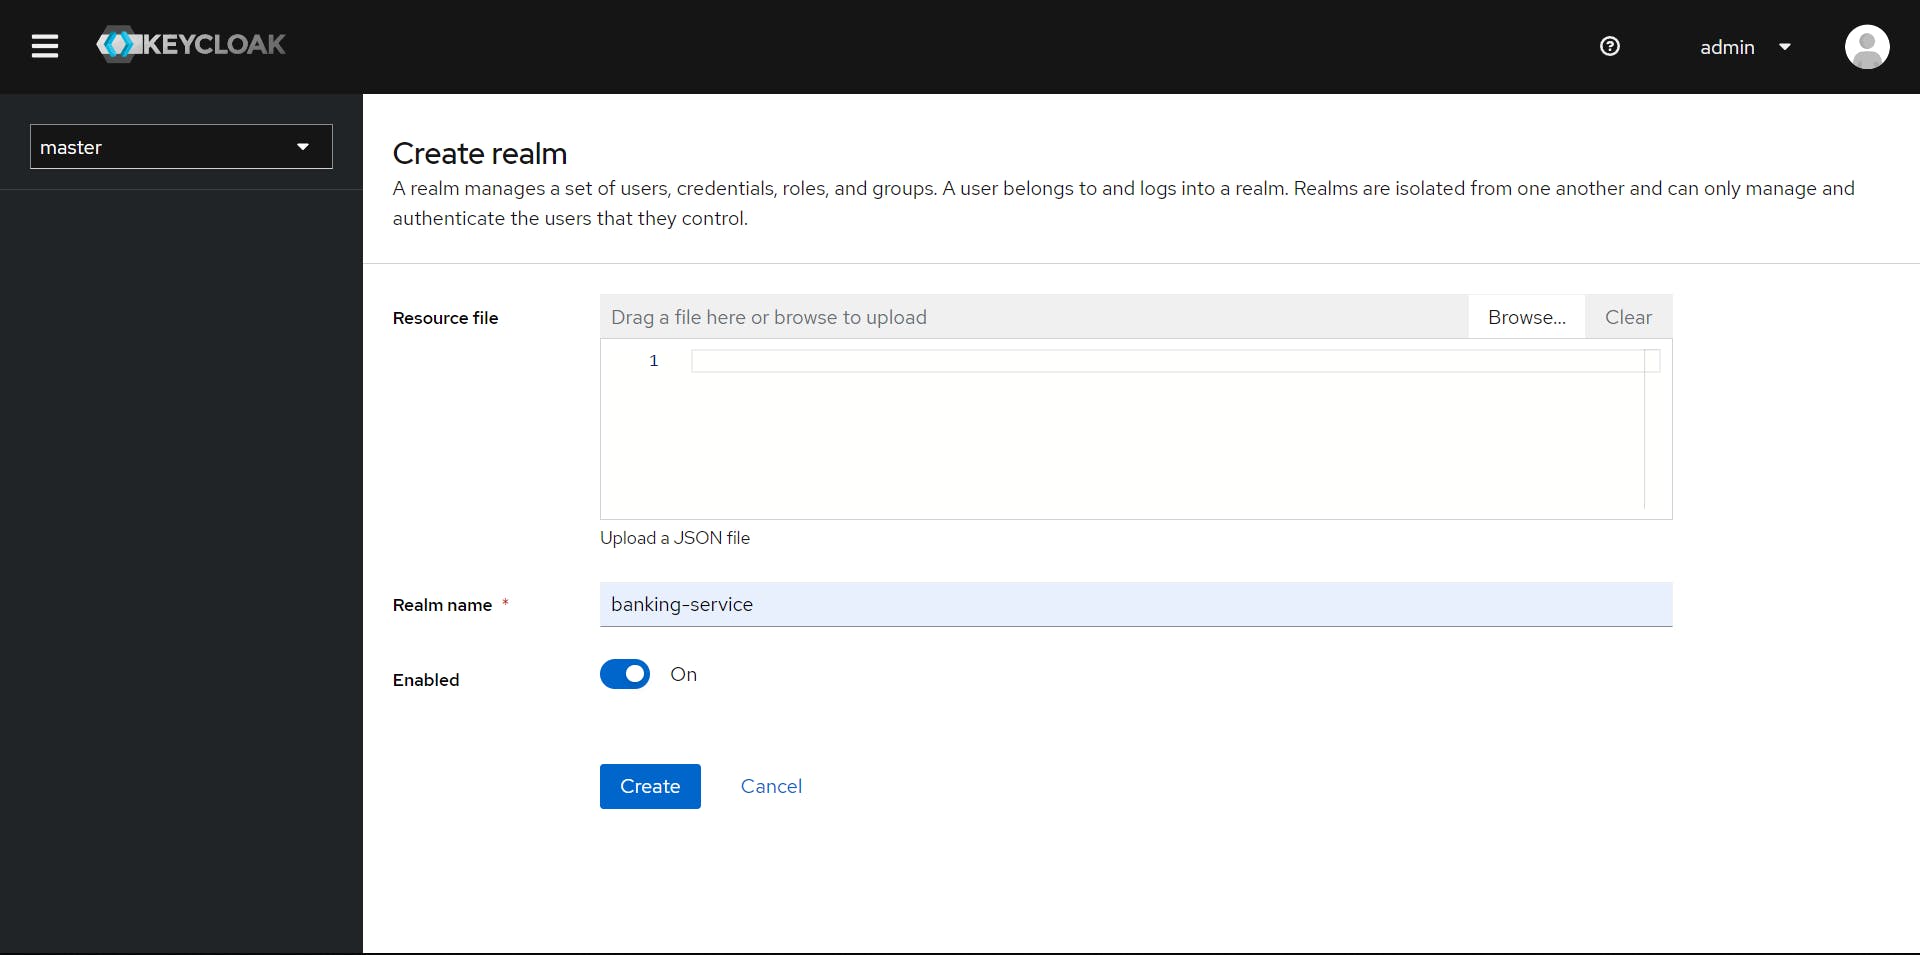
Now, we are going to create a realm by the name "banking-service" which we are going to use in our application.
After which we are going to create a client, named "banking-service-client".
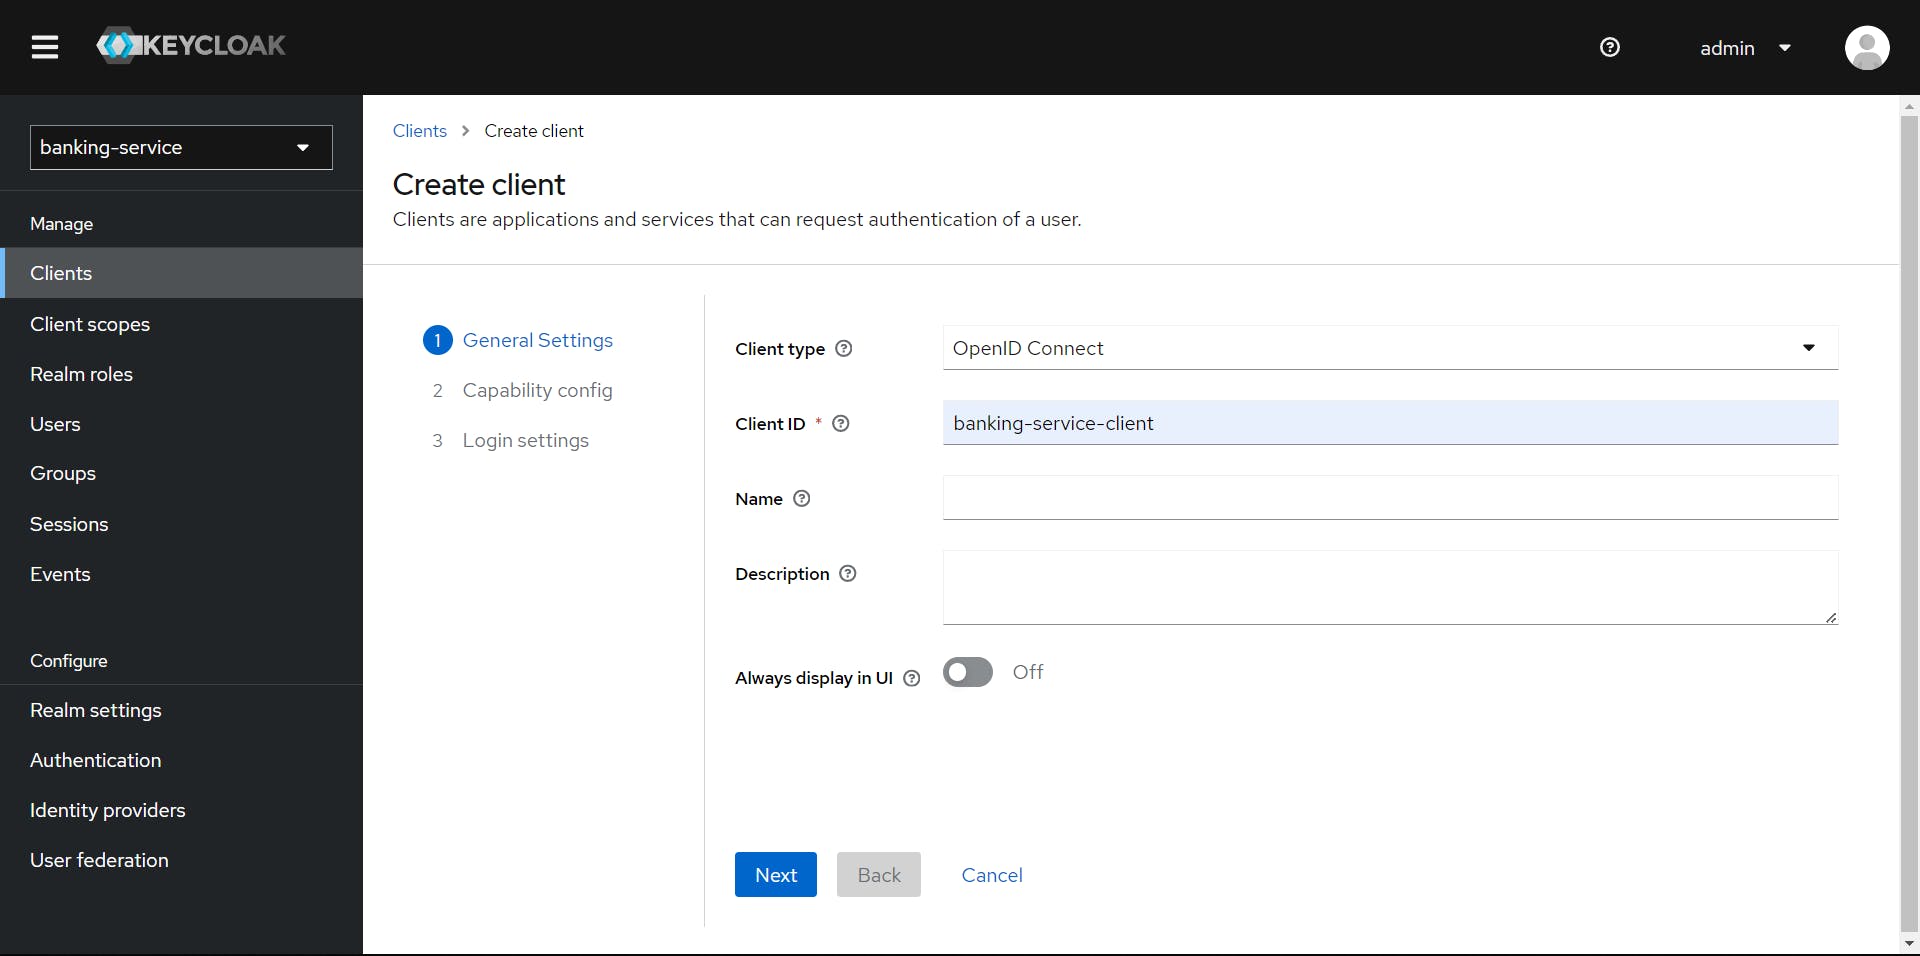
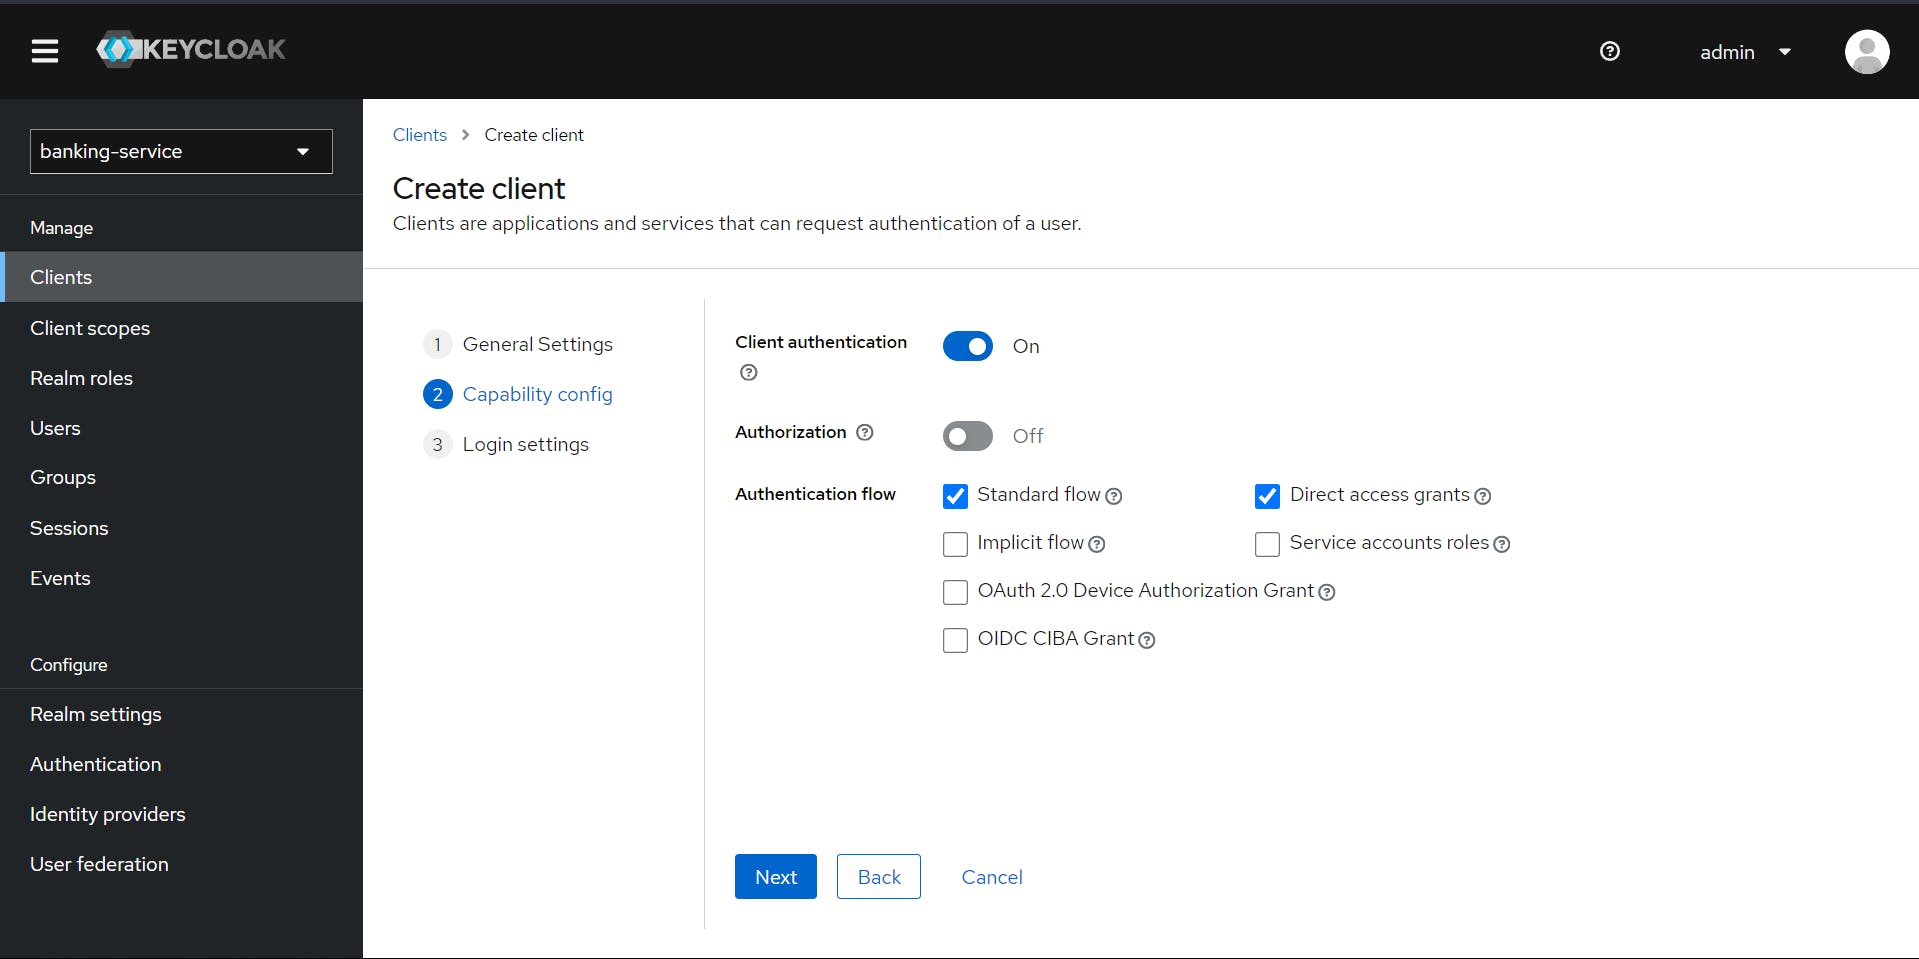
Now, we are will be enabling the Client authentication, which provides additional layer of security to the interactions between clients and the identity server, ensuring that only authorized and authenticated clients can access protected resources and perform authentication-related actions.
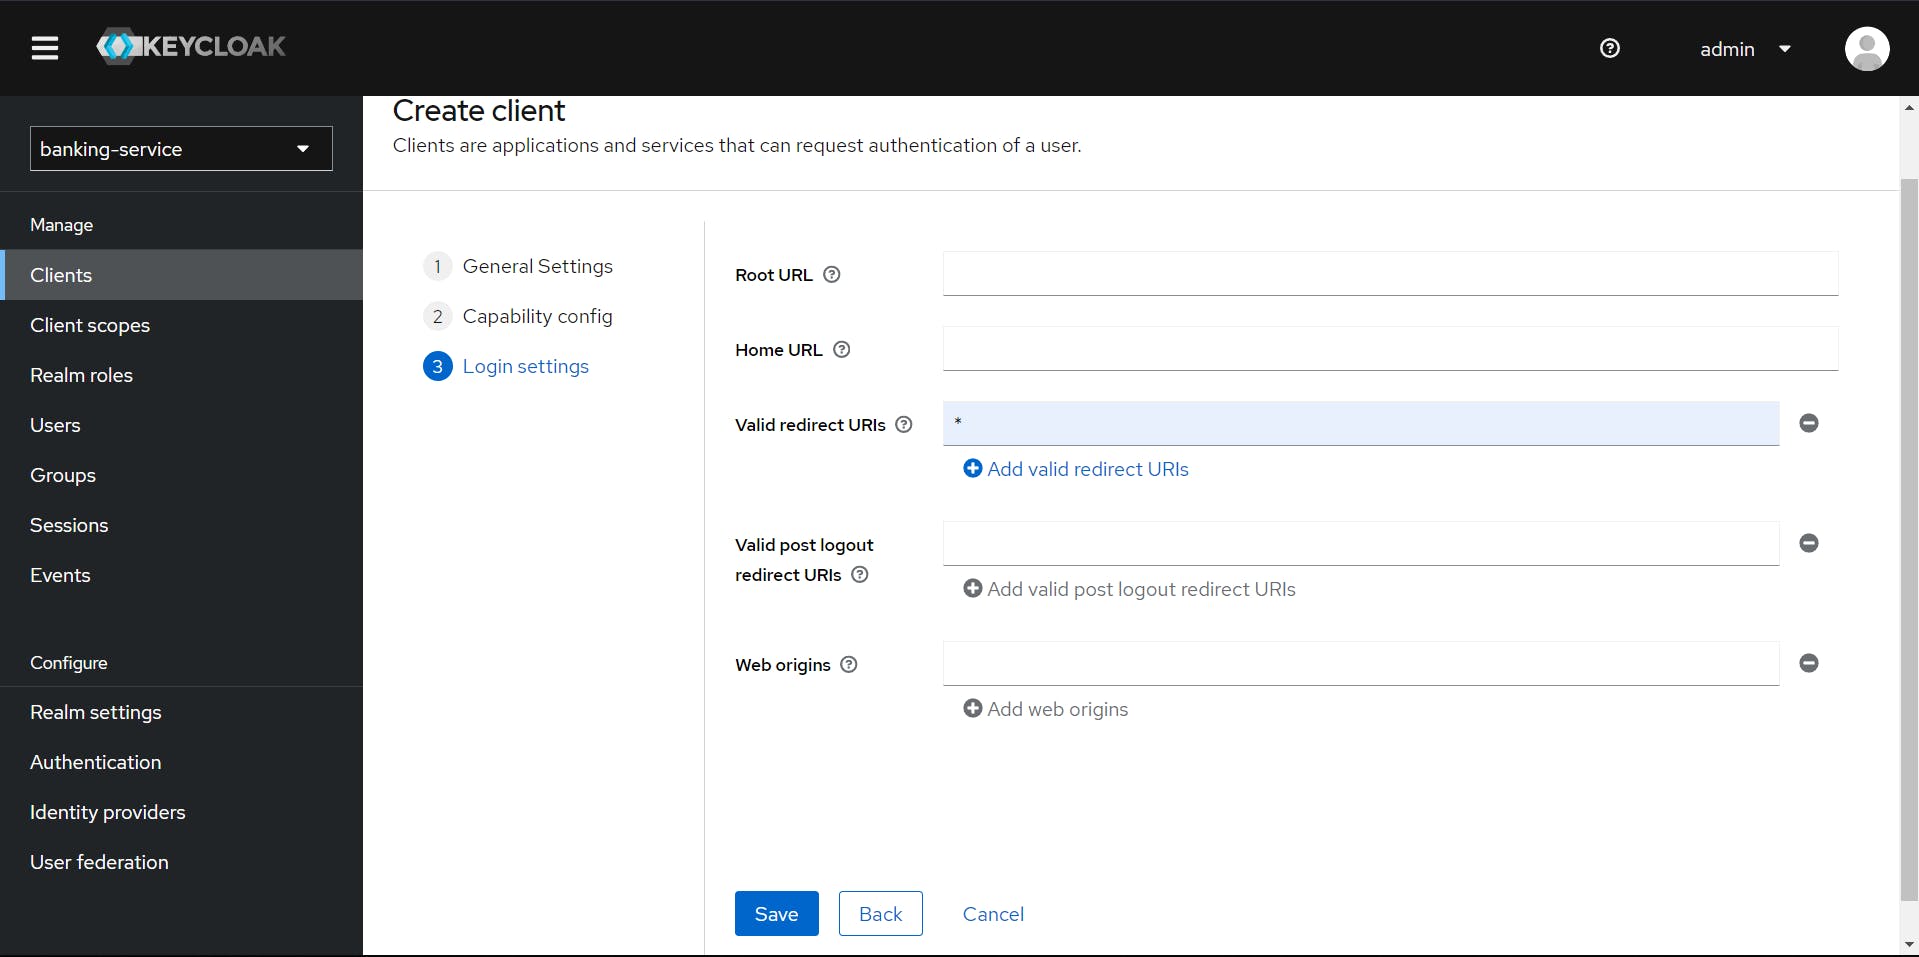
Changing the Valid redirect URIs to "*" ,allows the client to accept redirect requests from any valid URL, useful for testing or when the redirect URL is dynamic.
Creating users is a fundamental component of identity and access management. They play a central role in facilitating secure authentication and authorization processes for applications.

We are creating user with username super-user, we are also enabling the Email verified is useful for applications that rely on verified email addresses for user communication or additional security measures. For example, it can be utilized to ensure that only users with verified email addresses are allowed specific privileges or to enhance the overall trustworthiness of user accounts.
Now we setup password for the user we just created.

For a detailed document containing all the steps and additional explanations, please refer to the comprehensive setup guide provided with the below document.
Configuring OAuth2.0 with Keycloak for Spring Cloud API Gateway
Now, we will be configuring the API gateway to use Keycloak and enable authentication and authorization services for the application at the gateway. We will also configure the gateway by adding the necessary settings to the application.yml file.
Let's add some of the required dependencies (get the below dependencies from Spring Initializr) :
<dependency>
    <groupId>org.springframework.boot</groupId>
    <artifactId>spring-boot-starter-oauth2-client</artifactId>
</dependency>
<dependency>
    <groupId>org.springframework.boot</groupId>
    <artifactId>spring-boot-starter-oauth2-resource-server</artifactId>
</dependency>
Applying the required configuration in application.yml file:
app:
  config:
    keycloak:
      url: http://localhost:8571/
      realm: banking-service

spring:
    security:
        oauth2:
          client:
            provider:
              keycloak:
                token-uri: ${app.config.keycloak.url}/realms/${app.config.keycloak.realm}/protocol/openid-connect/token
                authorization-uri: ${app.config.keycloak.url}/realms/${app.config.keycloak.realm}/protocol/openid-connect/auth
                user-name-attribute: preferred_username
                user-info-uri: ${app.config.keycloak.url}/realms/${app.config.keycloak.realm}/protocol/openid-connect/userinfo
                jwk-set-uri: ${app.config.keycloak.url}/realms/${app.config.keycloak.realm}/protocol/openid-connect/certs
                user-info-authentication-method: header
            registration:
              banking-service-client:
                provider: keycloak
                client-id: banking-service-client
                client-secret: Au6eAD2JgB5MH0G2tNrPLfKqObswfSPb
                authorization-grant-type: authorization_code
                redirect-uri: http://localhost:8571/login/oauth2/code/keycloak
                scope: openid
          resourceserver:
            jwt:
              jwk-set-uri: ${app.config.keycloak.url}/realms/${app.config.keycloak.realm}/protocol/openid-connect/certs
app.config.keycloak.urlandapp.config.keycloak.realmare configuration parameters for the Keycloak server. The URL represents the base URL of the Keycloak server, and the realm represents the name of the Keycloak realm.spring.security.oauth2is a Spring Security configuration for OAuth2 authentication.client.provider.keycloakspecifies the configuration for the Keycloak identity provider.token-uri,authorization-uri,user-info-uri, andjwk-set-uriare URIs for the Keycloak endpoints related to OAuth2 and OpenID Connect.user-name-attributeis set topreferred_username, indicating the attribute to use as the username.user-info-authentication-methodis set toheader, indicating that the user info should be fetched using a header.client.registration.banking-service-clientcontains the registration details for the client application.client-idandclient-secretare the credentials of the client application registered in Keycloak.authorization-grant-typeis set toauthorization_code, indicating the authorization code grant type.redirect-uriis the URI where the authorization response is sent.scopeis set toopenid, indicating the requested scope.resourceserver.jwt.jwk-set-urispecifies the URI to retrieve the JSON Web Key Set (JWKS) used to verify the JWT (JSON Web Token) signatures.
Adding the Java based configuration to the API Gateway:
package org.training.api.gateway.config;

import org.springframework.context.annotation.Bean;
import org.springframework.context.annotation.Configuration;
import org.springframework.security.config.annotation.web.reactive.EnableWebFluxSecurity;
import org.springframework.security.config.web.server.ServerHttpSecurity;
import org.springframework.security.web.server.SecurityWebFilterChain;

@Configuration
@EnableWebFluxSecurity
public class SecurityConfig {

    @Bean
    public SecurityWebFilterChain securityWebFilterChain(ServerHttpSecurity http) {
        http
                .authorizeExchange()
                //ALLOWING REGISTER API FOR DIRECT ACCESS
                .pathMatchers("/api/users/register").permitAll()
                //ALL OTHER APIS ARE AUTHENTICATED
                .anyExchange().authenticated()
                .and()
                .csrf().disable()
                .oauth2Login()
                .and()
                .oauth2ResourceServer()
                .jwt();
        return http.build();
    }
}
@Configuration- Marks the class as a configuration class, indicating that it contains bean definitions.@EnableWebFluxSecurity- Enables Spring Security for a WebFlux application.@Bean- Defines a bean of typeSecurityWebFilterChain, which is a chain of filters for processing web-based security.SecurityWebFilterChain securityWebFilterChain(ServerHttpSecurity http)- Configures security settings usingServerHttpSecurity..authorizeExchange()- Begins the configuration for authorization rules..pathMatchers("/api/users/register").permitAll()- Specifies that the/api/users/registerendpoint is accessible without authentication (permit all)..anyExchange().authenticated()- Requires authentication for all other endpoints..and()- Combines multiple security rules..csrf().disable()- Disables CSRF protection. This is common when dealing with stateless applications..oauth2Login()- Configures OAuth2 login support..oauth2ResourceServer().jwt()- Configures OAuth2 resource server using JSON Web Token (JWT) for authentication.returnhttp.build();- Builds and returns the configuredSecurityWebFilterChain.
I'm using Postman to test the APIs, and I will be attaching the Postman collection below so that you can go through it.
Now, we will be generating the access token from Keycloak through Postman and also add the required information to do the same in the Postman Authorization tab.
Initially, in the Authorization tab, select OAuth2 as the type, and do not change any information that is present before the 'Configure New Token' section.
Set the Grant type to Password Credentials and provide any name at Token name.
Access Token URL: localhost:8571/realms/banking-service/proto..
Now, we need to get the Client ID and client secret of the client we just created. We can get the Client ID from the 'Settings' tab of the client—in our case, it is 'banking-service-client'—and the client secret from the 'Credentials' tab.
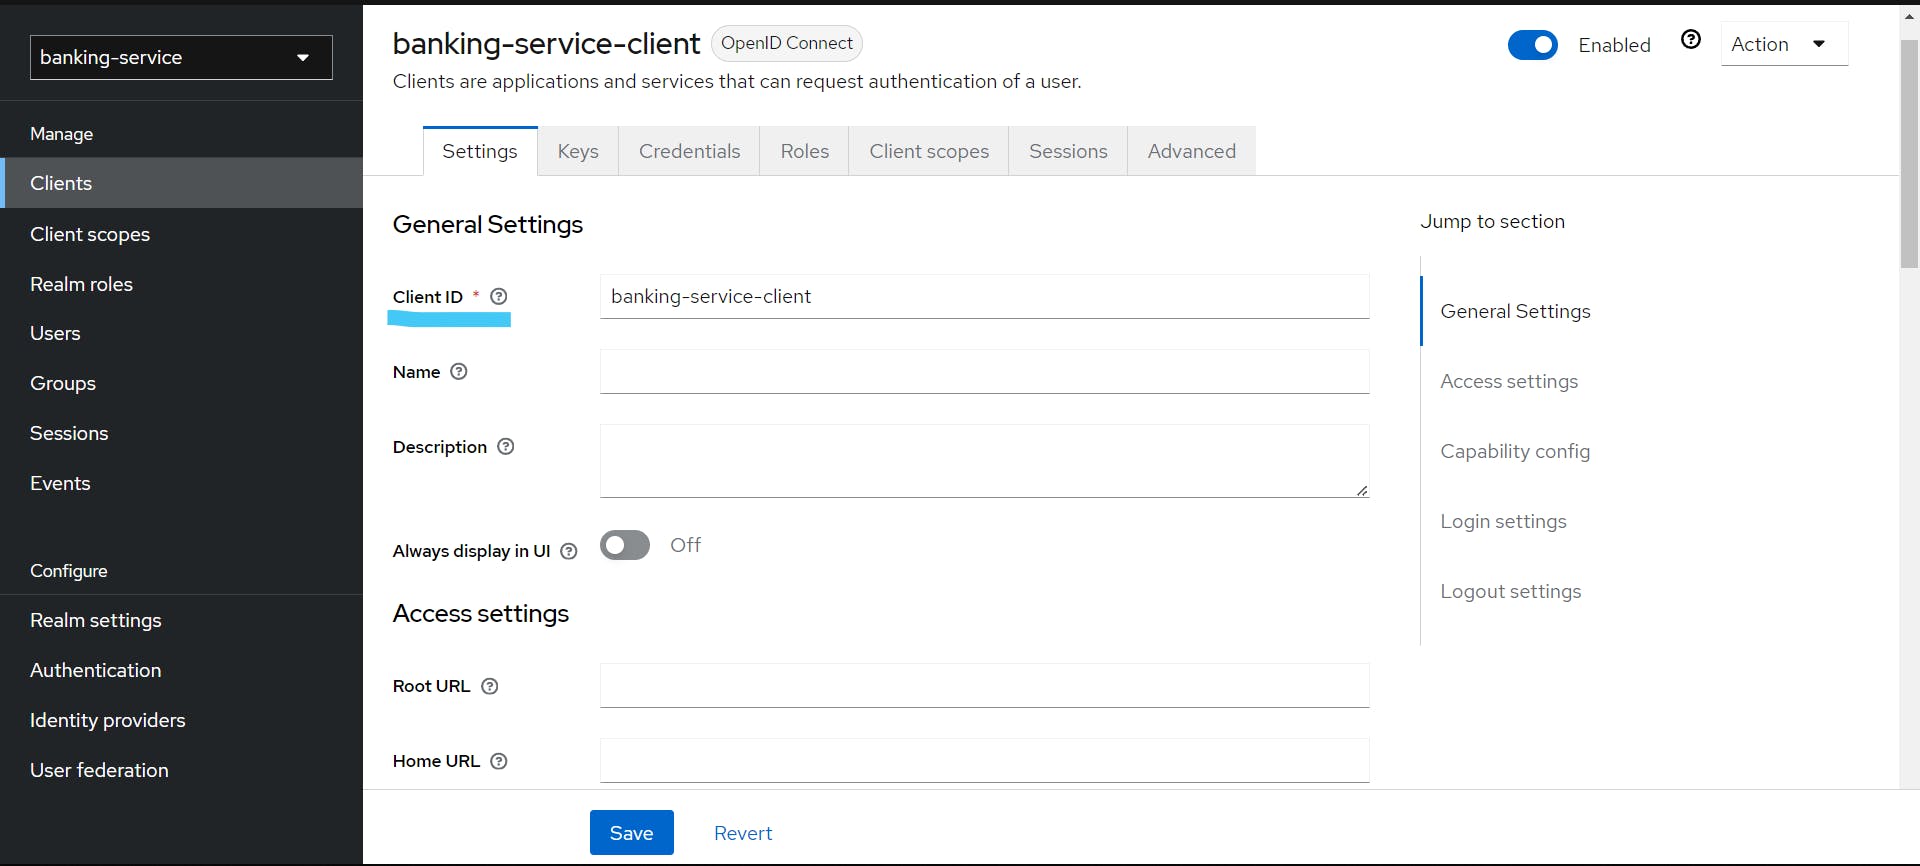
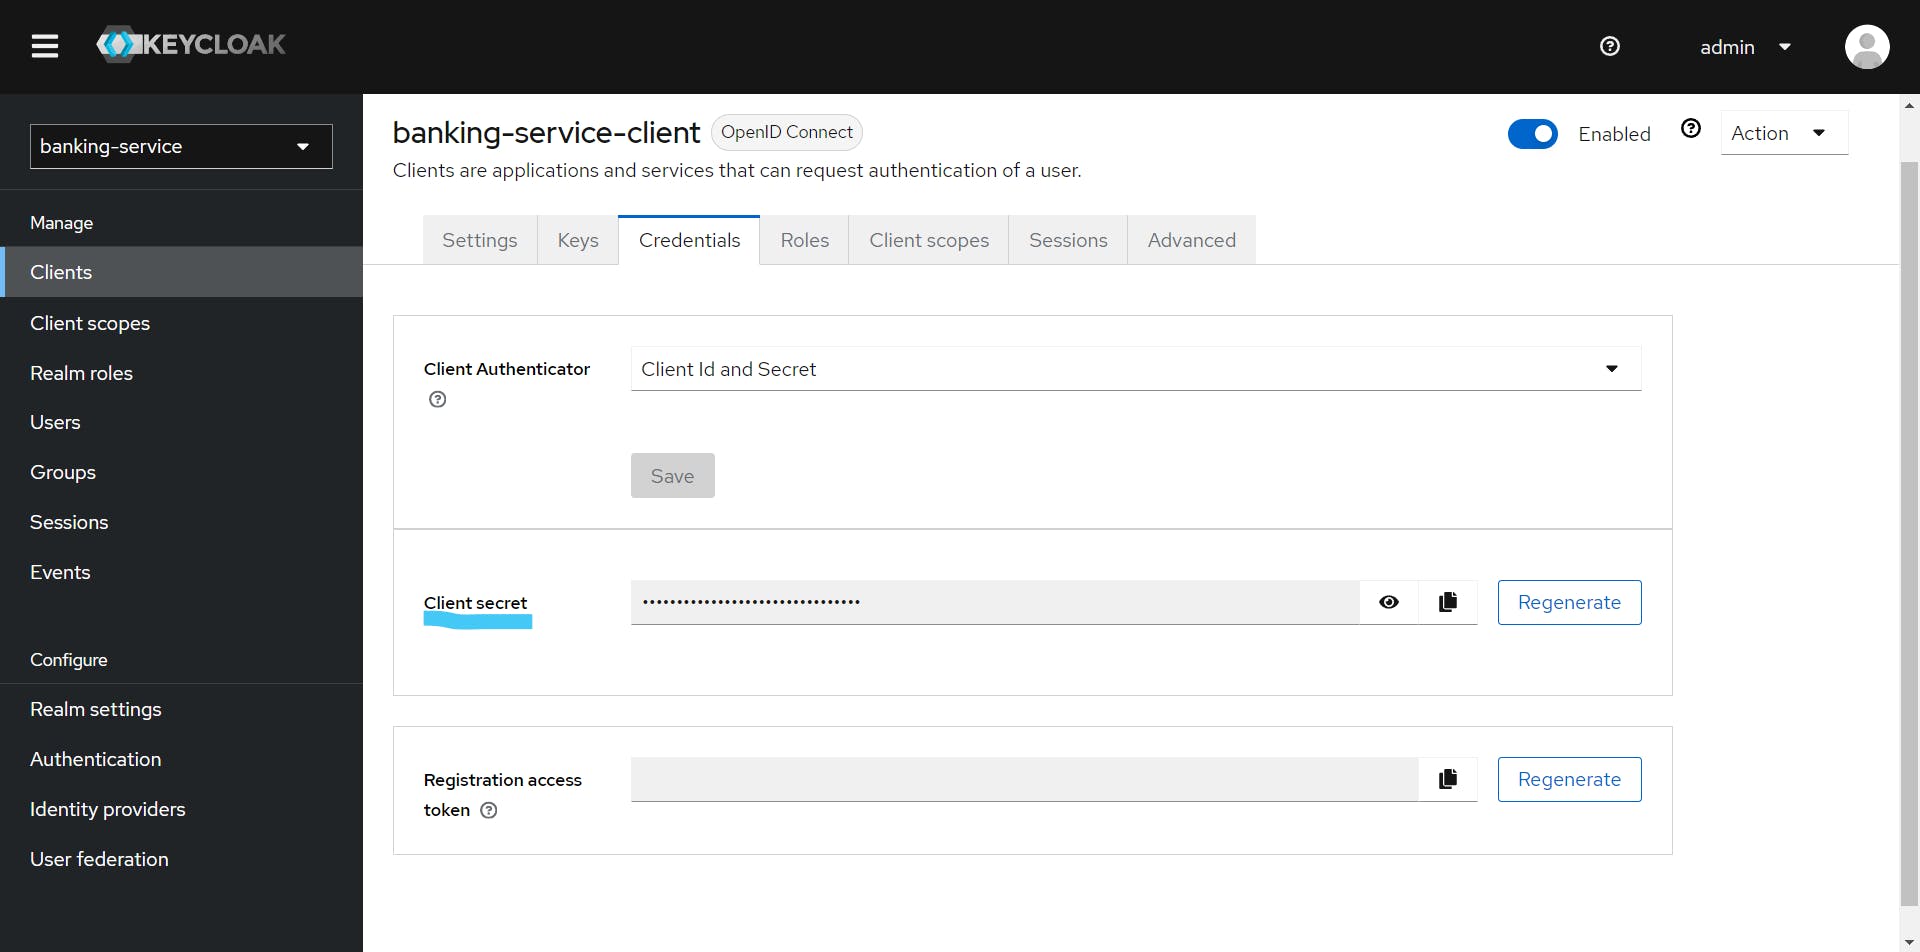
Client ID: banking-service-client
Client Secret: Au6eAD2JgB5MH0G2tNrPLfKqObswfSPb
Username: super-user
Password: admin
Scope: openid offline_access
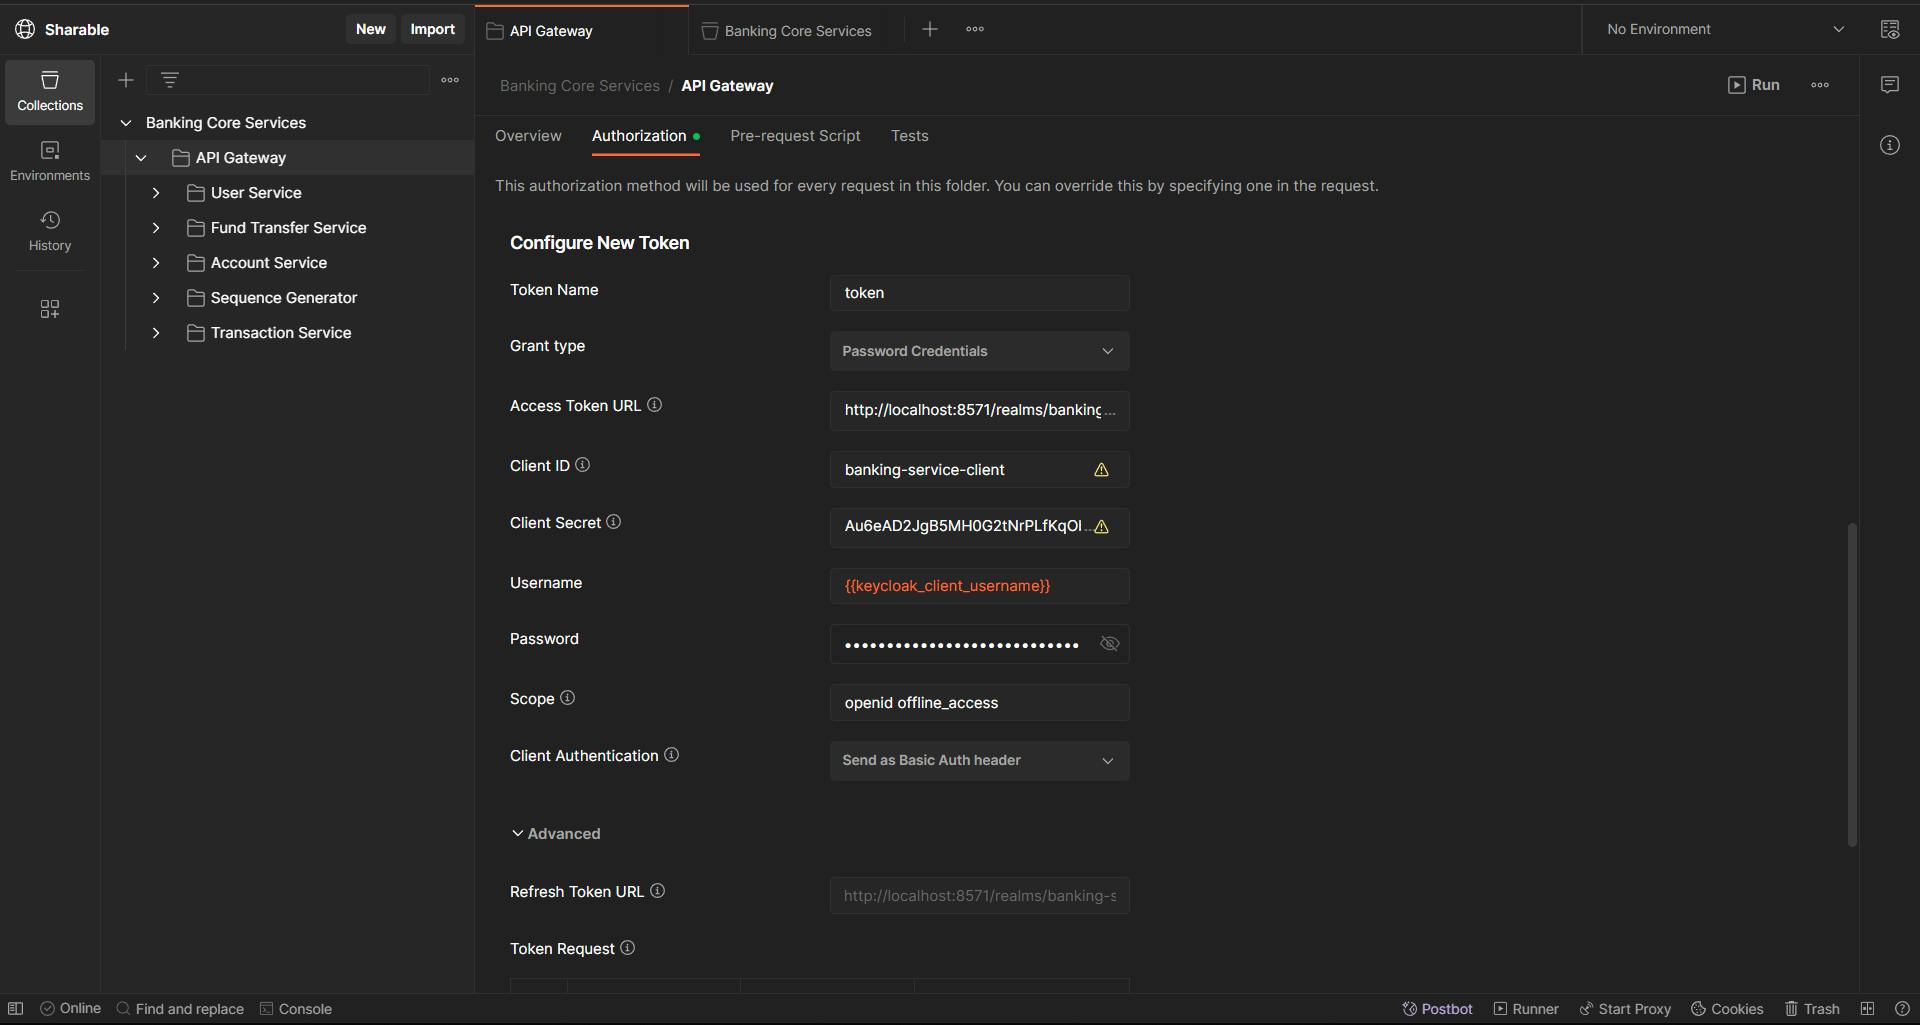
After adding all the configurations, we can generate the access token via Postman and use the token.
Now that we have configured authentication and authorization with Keycloak, we can move forward to creating all the required API endpoints.
Note: Please don't try not run the application since there are many configurations to be done.
Conclusion
Thanks for reading our latest article on Mastering Microservices: Authentication and Authorization with Keycloak with practical usage.
You can get source code for this tutorial from our GitHub repository.
Happy Coding!!!!😊

